PokerTracker 4 Quick Start Guide
Overview
Online poker sites write hand histories to your computer that detail every action in a hand. PokerTracker 4 parses those hand histories and stores statistics and hand information in a PostgreSQL database for later review.
This guide walks you through installing and configuring PokerTracker 4 and PostgreSQL, then covers the basics: importing hand histories, reviewing hands, and using the heads-up display (HUD) that shows statistics directly on top of the tables you play.
This guide applies to PokerTracker 4 on both Microsoft Windows and Apple macOS.
Installation
To install PokerTracker 4:
- Download the latest version from the PokerTracker website.
- Run the downloaded PT-Install.exe. If you are upgrading, close PokerTracker and all of your poker sites before running the installer.
- Read the license agreement and click I Agree to continue.
- Choose an install location and click Install. We recommend the default location.
- Click Close to finish. If the installation does not complete, contact PokerTracker support.
If this is your first time installing PokerTracker 4, continue to Installing the PostgreSQL Database Server. If PostgreSQL is already installed, skip ahead to Configuring PostgreSQL in PokerTracker 4.
Installing the PostgreSQL Database Server
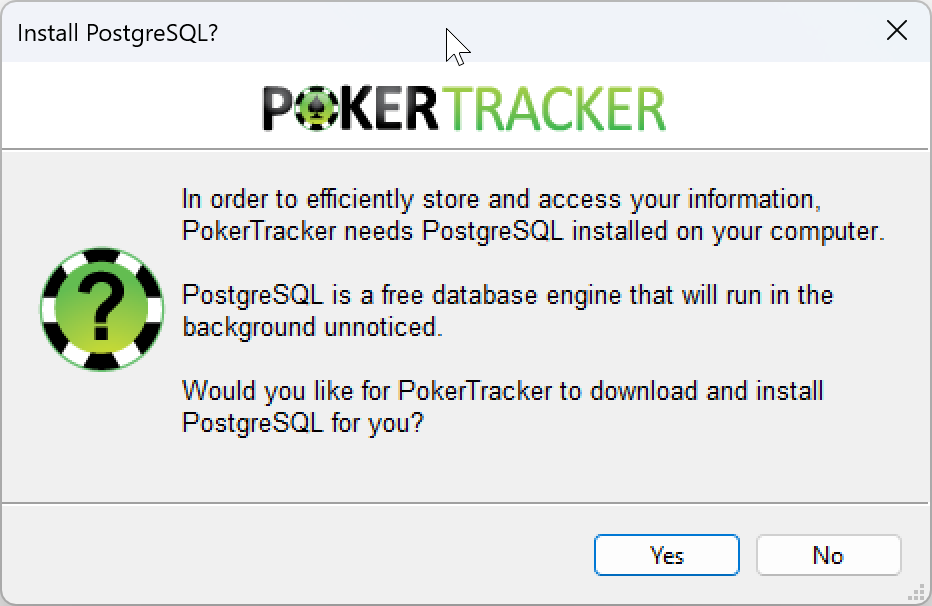
PokerTracker 4 stores imported hand histories and statistics in PostgreSQL, an open-source database server that must be installed for PokerTracker 4 to run. To learn more, visit postgresql.org.
The first time you run PokerTracker, if PostgreSQL is not installed you will be prompted to install it. Click Yes to continue, then configure the PostgreSQL settings.
Default PostgreSQL Settings
Unless you are an advanced user, we recommend the default settings:
| Setting | Default Value |
|---|---|
| Server | localhost |
| Port | 5432 |
| Service User | postgres |
| Service User Password | svcPASS83 |
| Database User | postgres |
| Database User Password | dbpass |
- Windows
- macOS
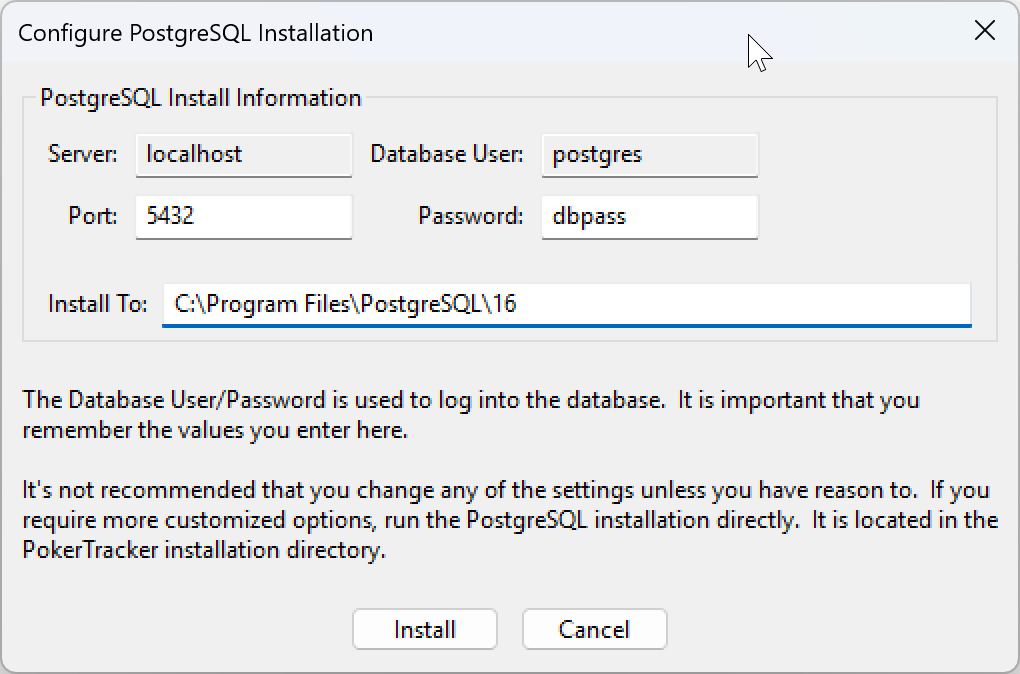

IMPORTANT: If you change the default passwords, write them down. PokerTracker support cannot recover your PostgreSQL passwords, so we recommend keeping the defaults.
Click Install and PokerTracker will install PostgreSQL on your computer.
Configuring PostgreSQL in PokerTracker 4
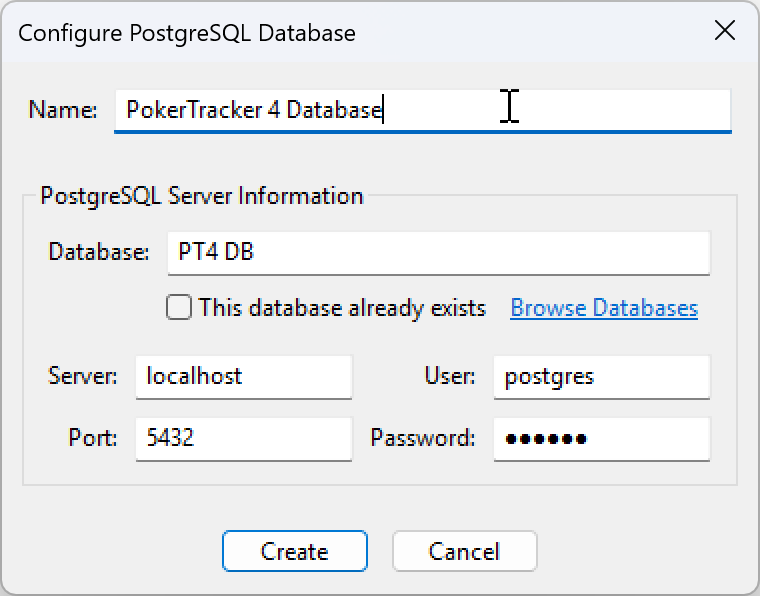
Once PostgreSQL is installed, you will be prompted to enter the server information so PokerTracker can connect to the database. If PokerTracker 4 installed PostgreSQL for you, the default settings are pre-populated. Click Connect to connect to the database server. If this is your first database, continue to Creating Your First Database. If you already created a database, skip ahead to Connecting to an Existing Database.
Creating Your First PokerTracker 4 Database
Once connected to the PostgreSQL database server, you will be prompted to create your first PokerTracker 4 database. In the Name field, enter a name for the database (or keep the default). PokerTracker 4 provides the default database settings; if you changed them during PostgreSQL installation, enter your values here. Click Create to create your first database, then continue to the Setup Assistant.
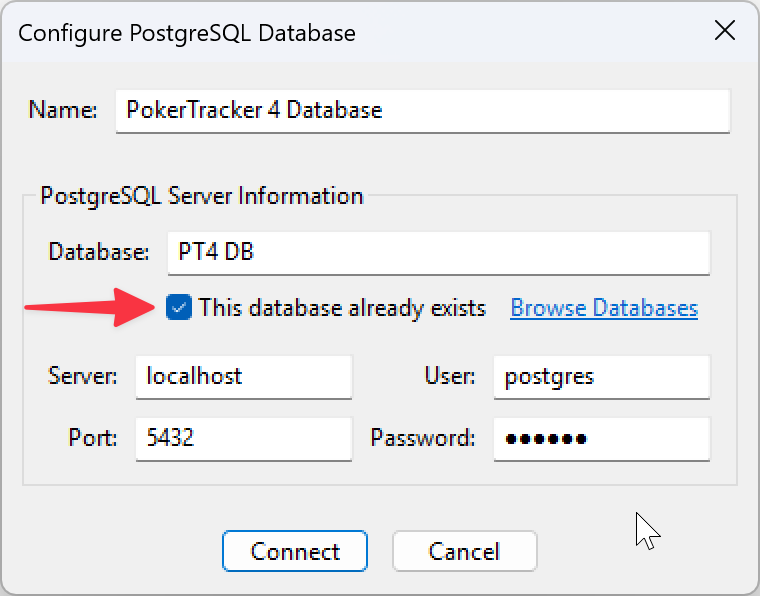
Connecting to an Existing Database
If you have an existing PokerTracker 4 database, click Browse Databases to list every database on your computer. Select the one you want and click OK. If no databases are listed, you have no existing PokerTracker 4 databases — go back to Creating Your First Database.
Check the This database already exists option when connecting to an existing database.
Setup Assistant
The Setup Assistant helps you configure PokerTracker 4 with the poker site(s) you play on.
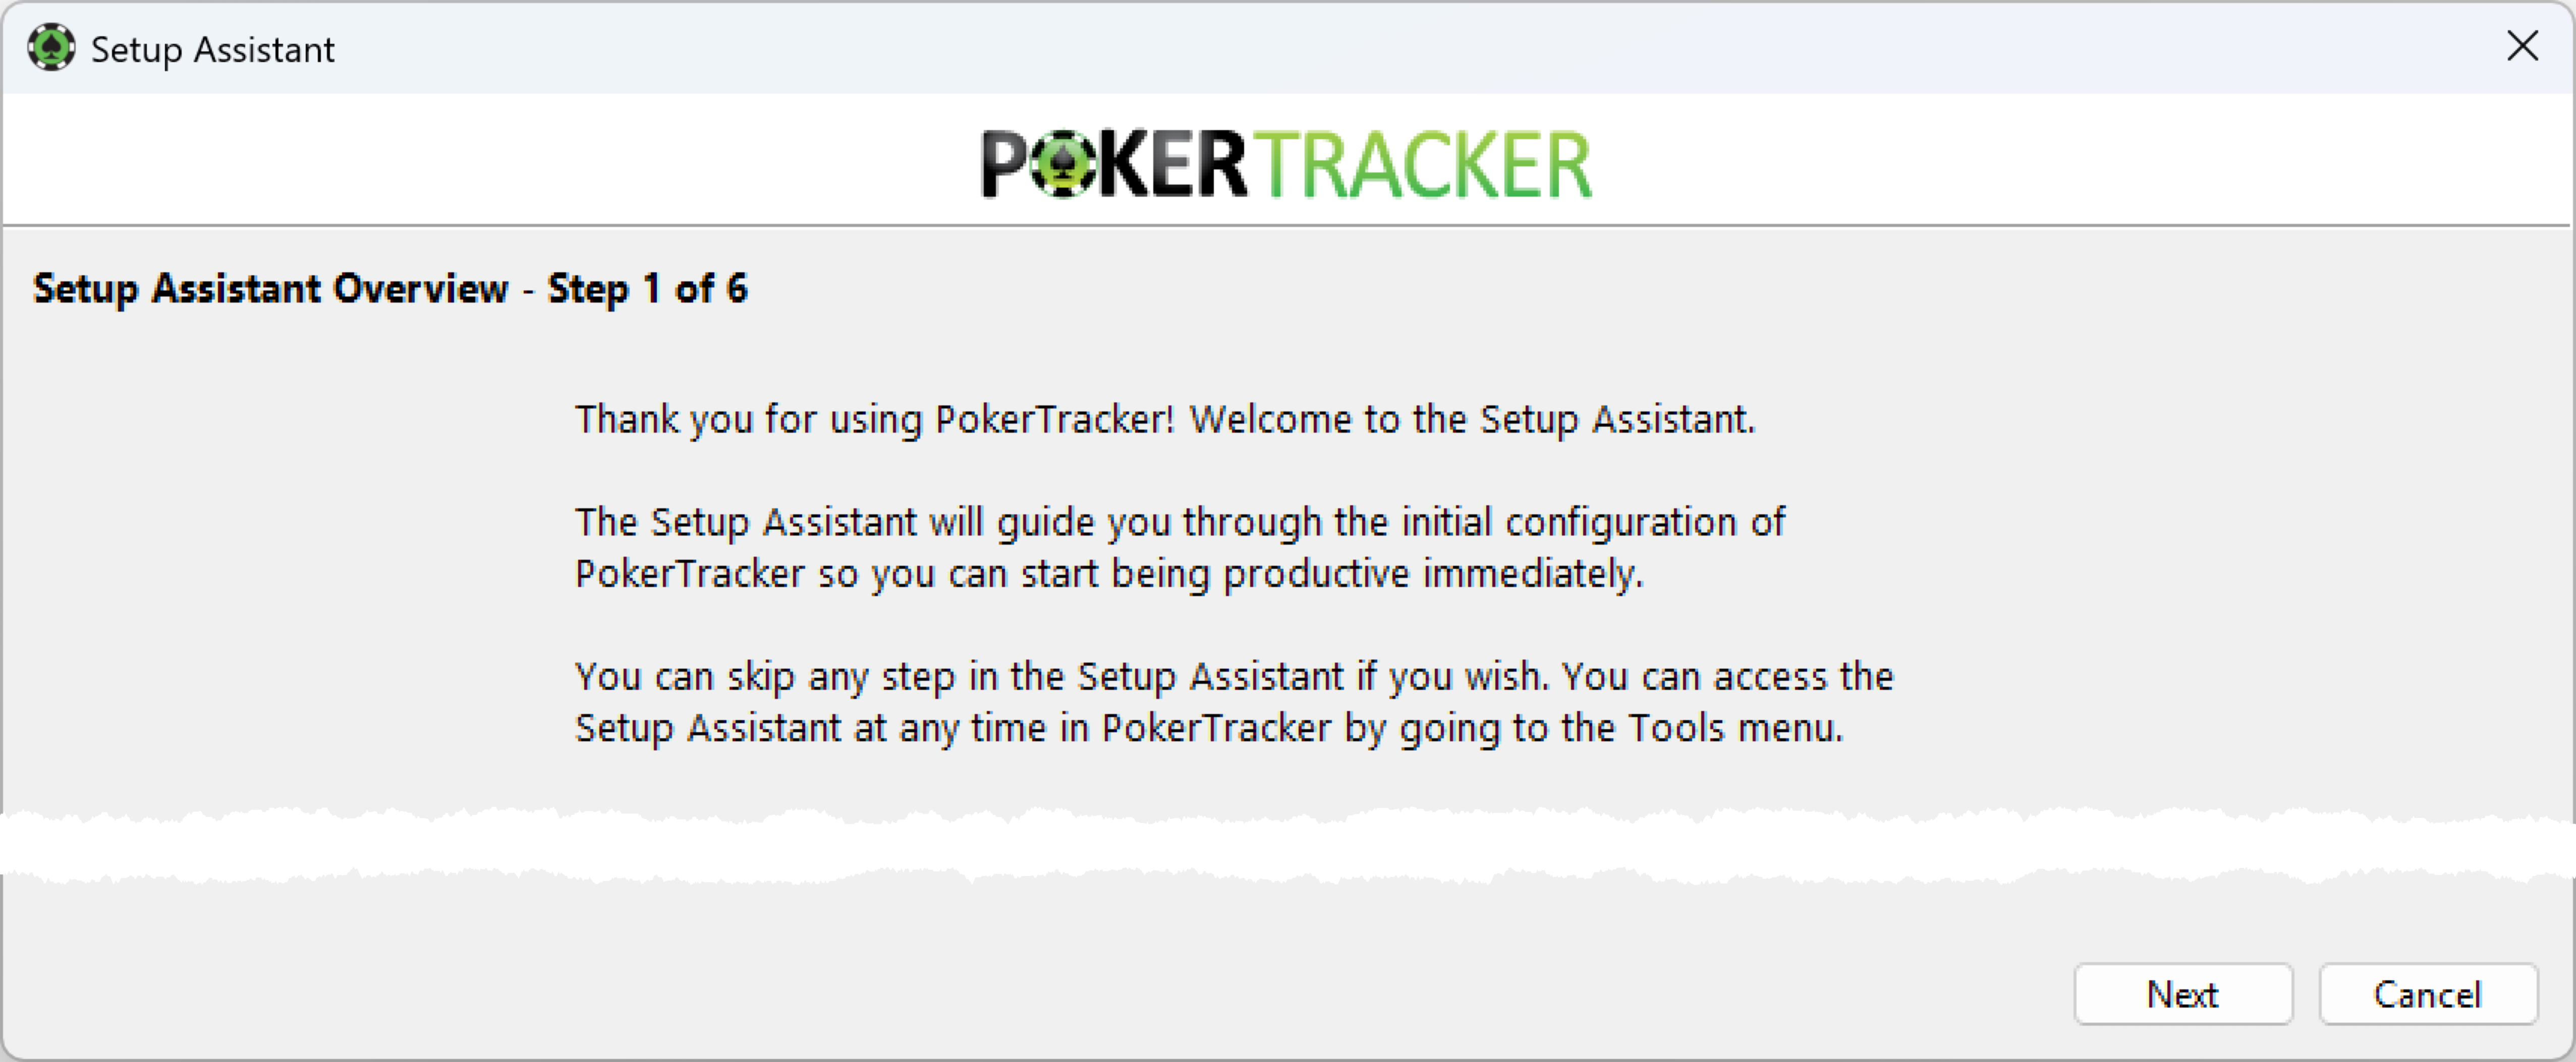
The Setup Assistant has four parts, covered below. Use it to:
- Set up PokerTracker 4 the first time you run the program
- Configure new sites, themes, or databases later on
- Convert Holdem Manager and PokerTracker 3 databases
The first time you run PokerTracker 4, the Setup Assistant launches automatically. You can run it any time from Tools > Setup Assistant.
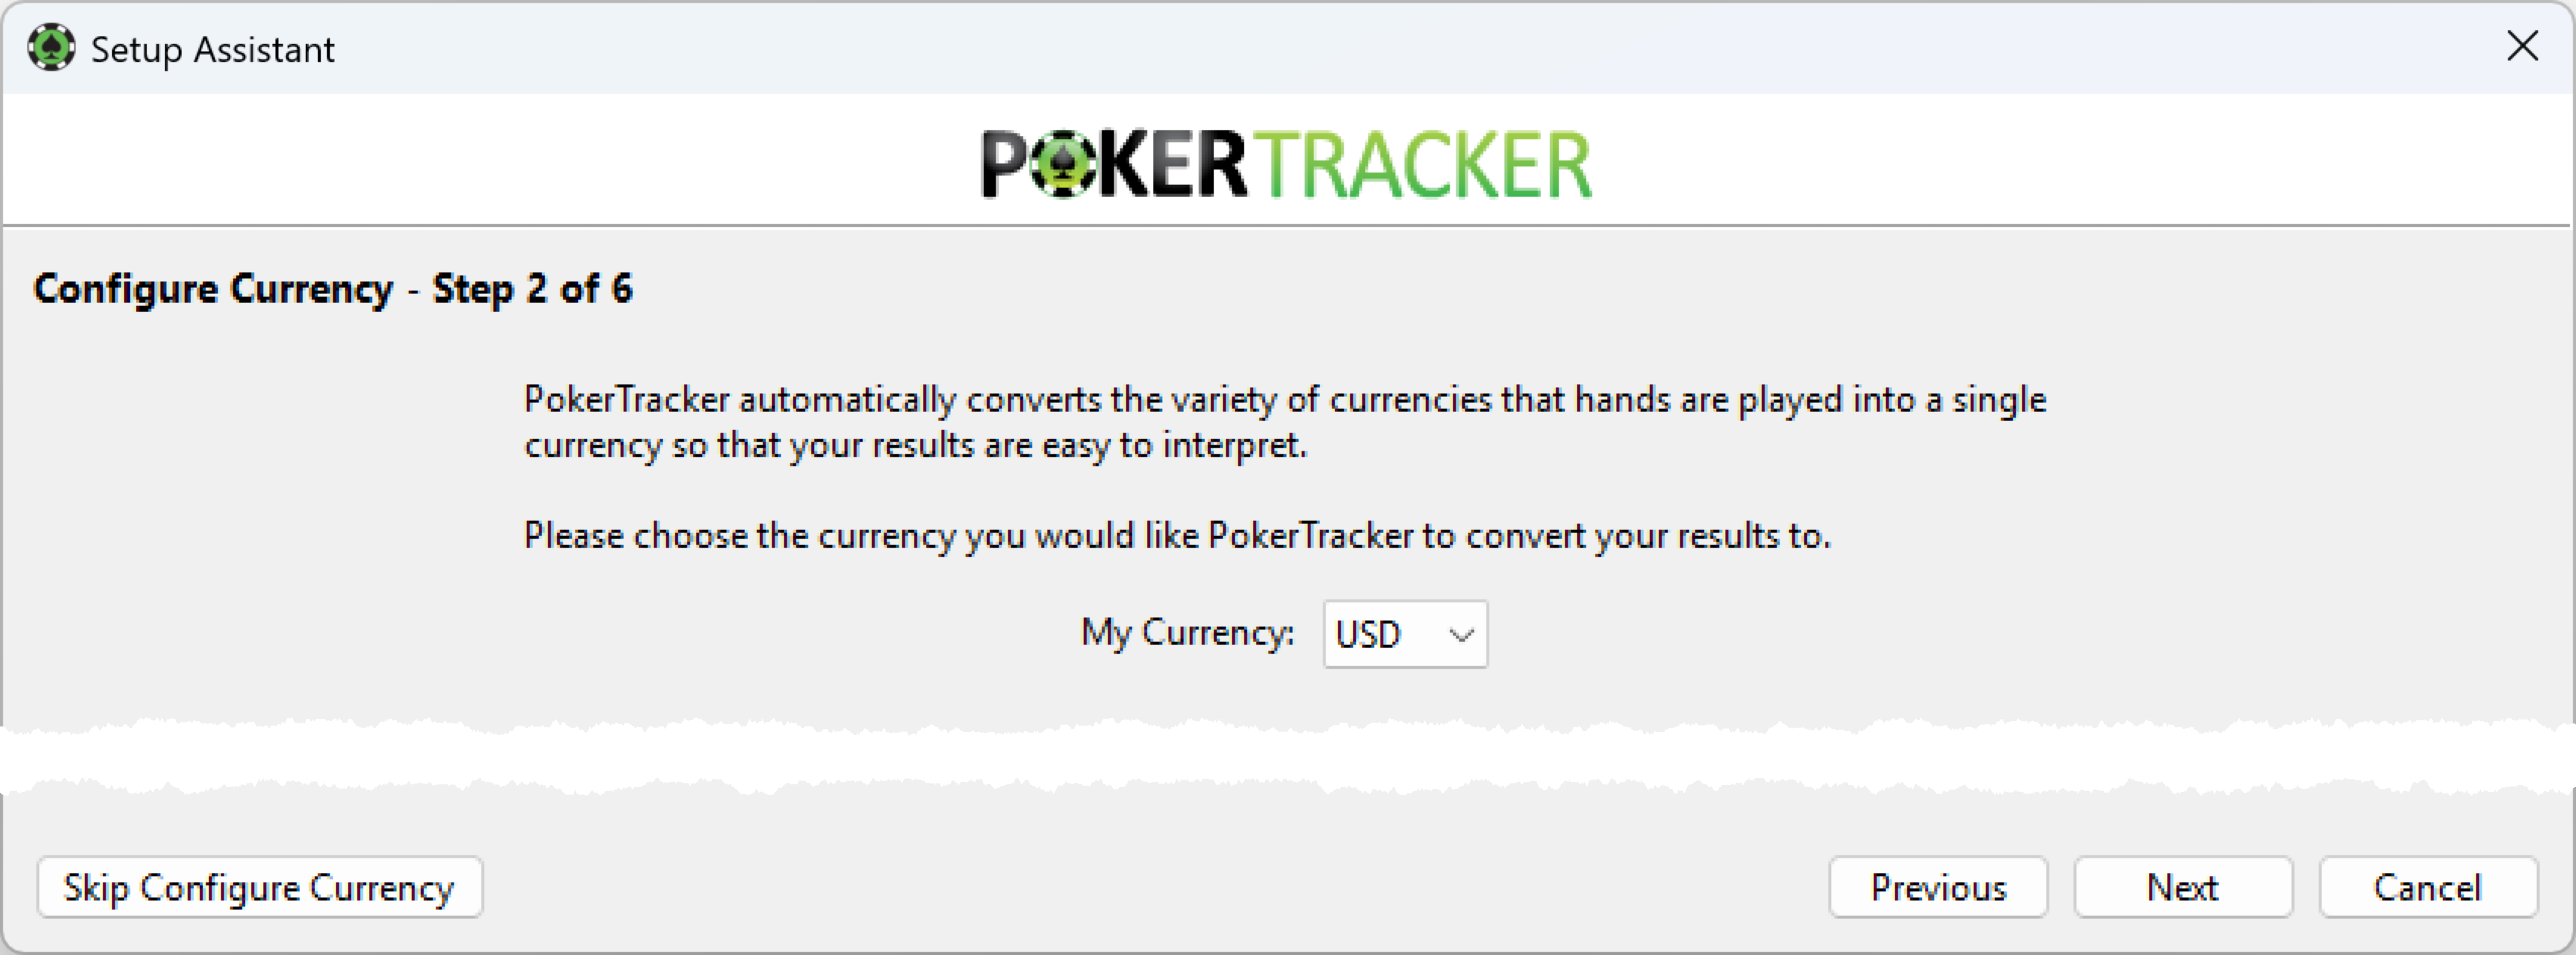
Configuring Your Currency
The first step configures your currency. PokerTracker 4 converts different currencies into one so your results are easier to read. Select your currency from the dropdown and click Next. To skip this step, click Skip Currency Conversion.
Configuring Your Poker Sites
This step configures the sites you play on. Toggle each poker site you play to YES, then click Next. To skip this step, click Skip Configure Sites.
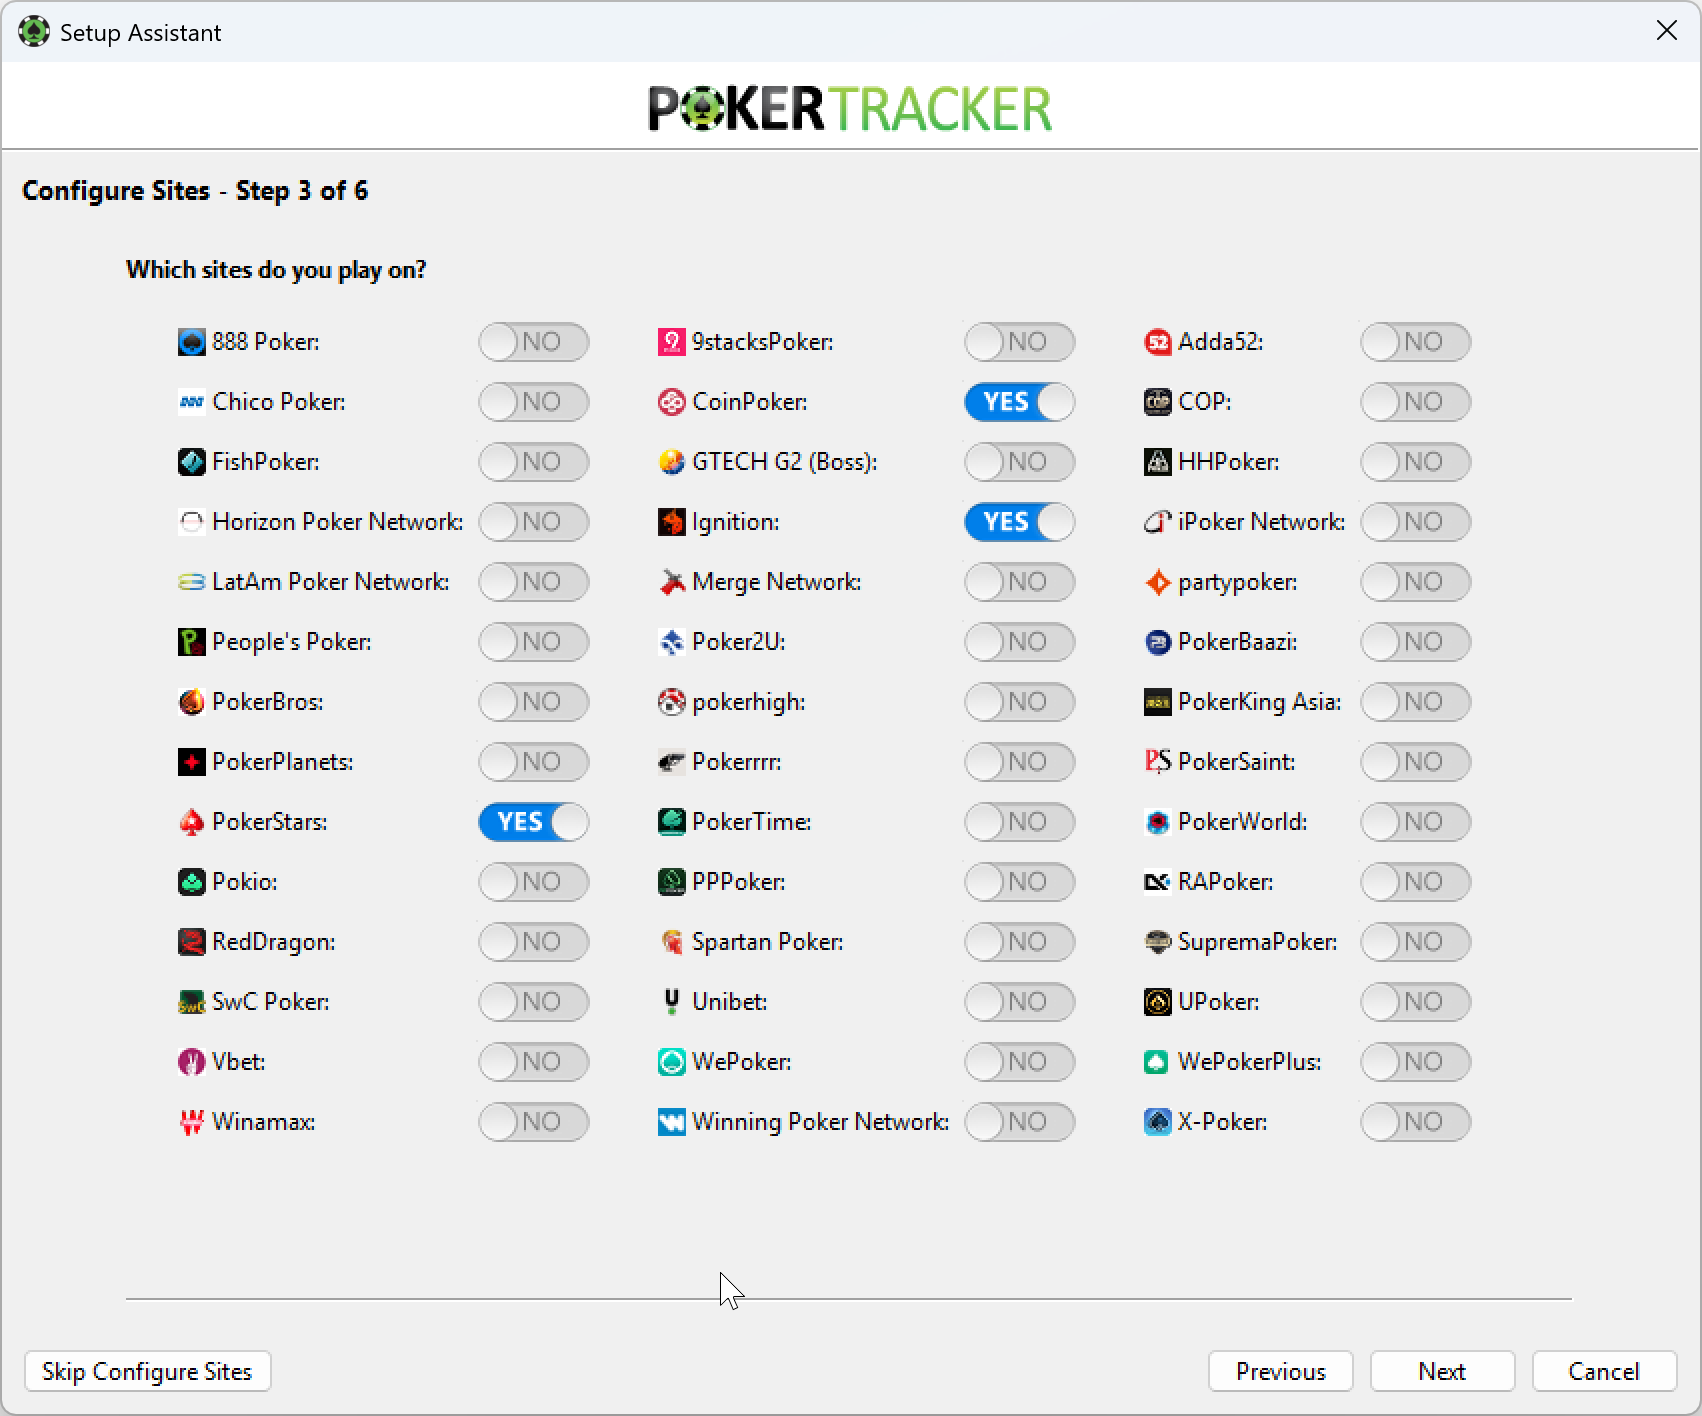
Each site must be configured for proper HUD and import performance. For site-specific help, find your site in the PokerTracker 4 Poker Site Configuration Guide. After configuring each site, you can import any existing hand histories.
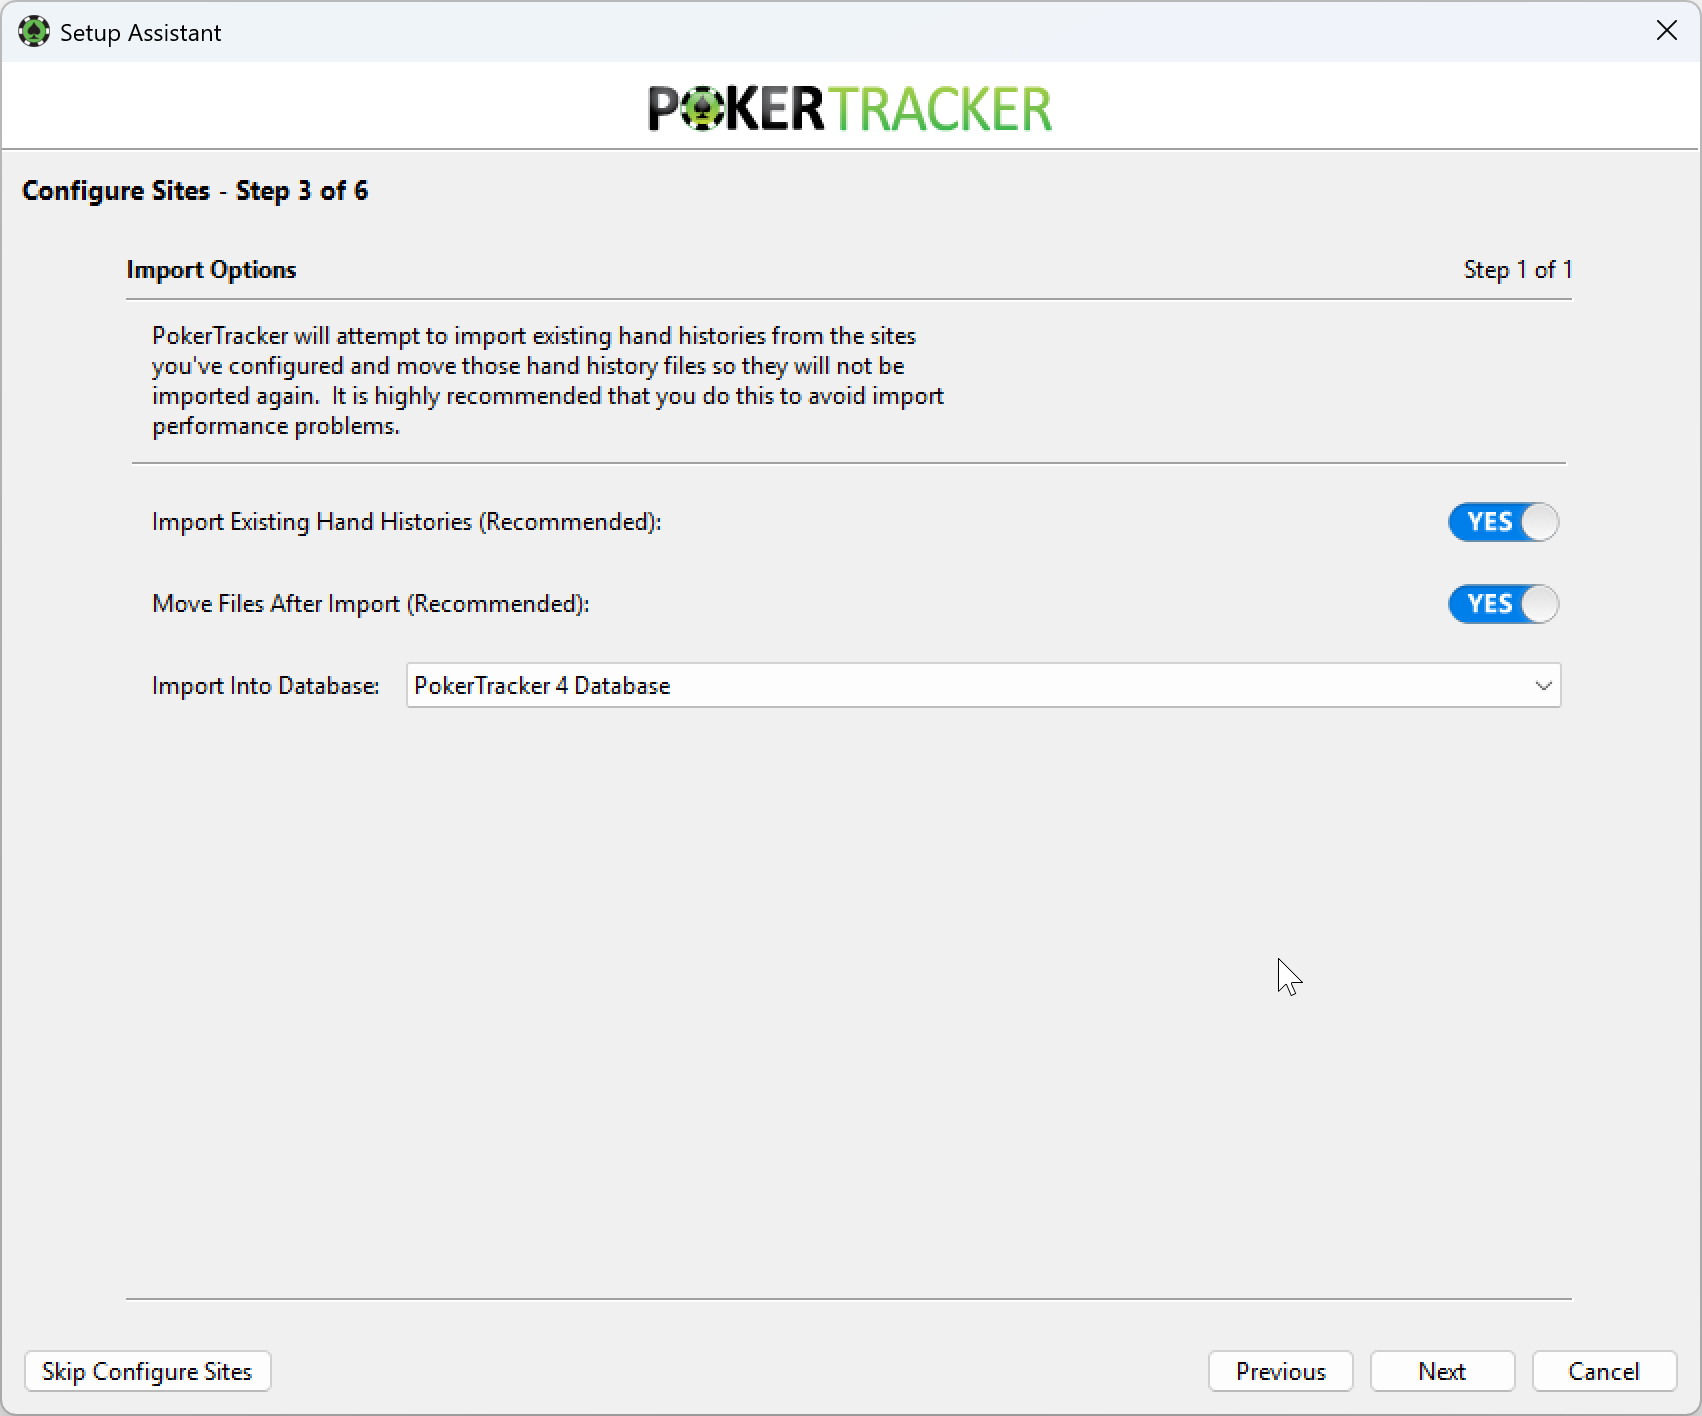
PokerTracker 4 attempts to import any existing hands in your site's hand history folder. From the dropdown, choose the database to import into. We recommend selecting YES for both Import Existing Hand Histories and Move Files After Import. Click Next to continue.
Configuring Themes
This step configures deck and replayer themes for a customized experience. Click a theme on the left to preview it, then click Make Active to apply it. For more themes, click Download New Themes, then add them with Import New Theme. Click Next to continue. To skip this step, click Skip Configure Themes.
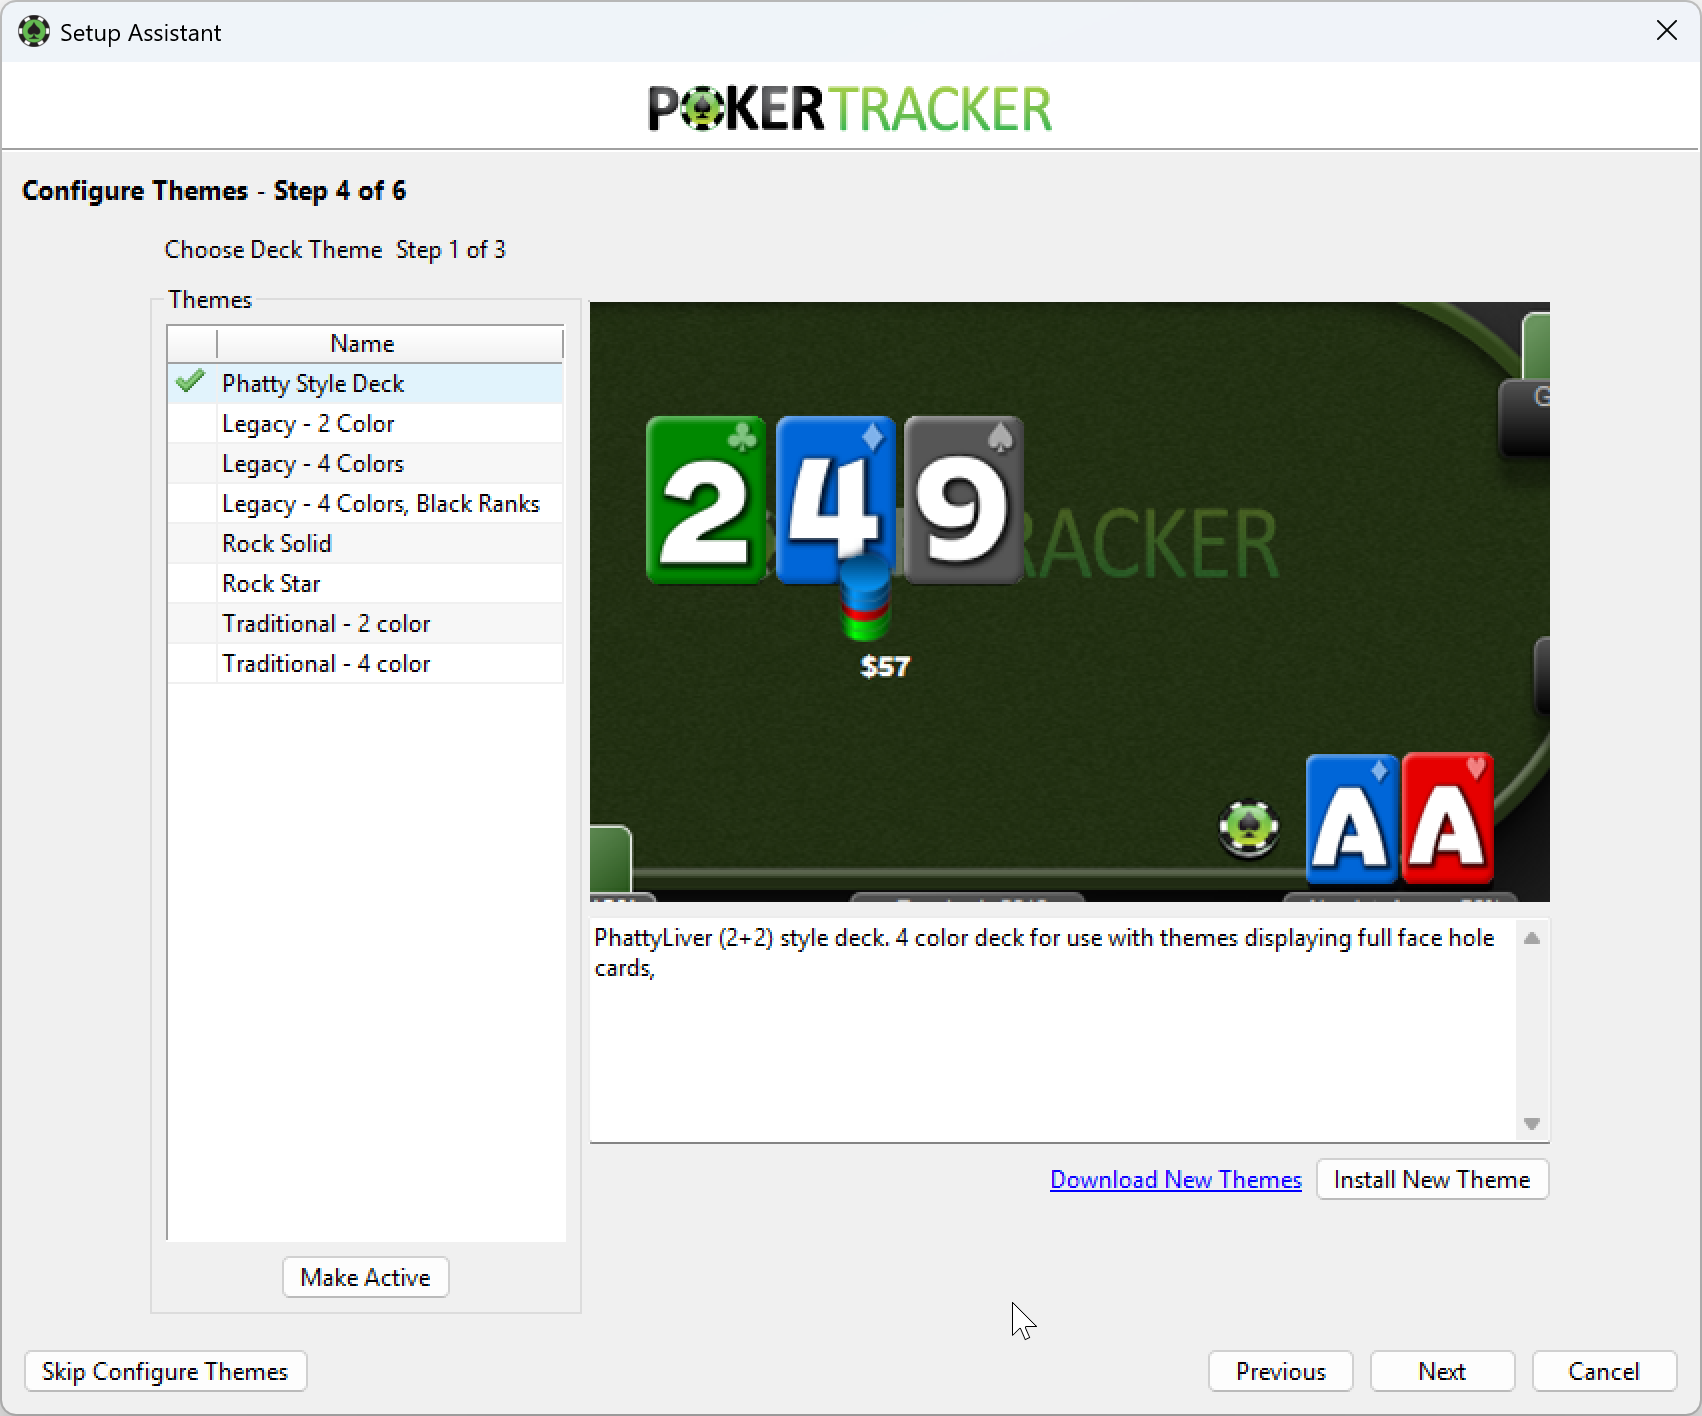
To create a custom theme, see the theme customization guide.
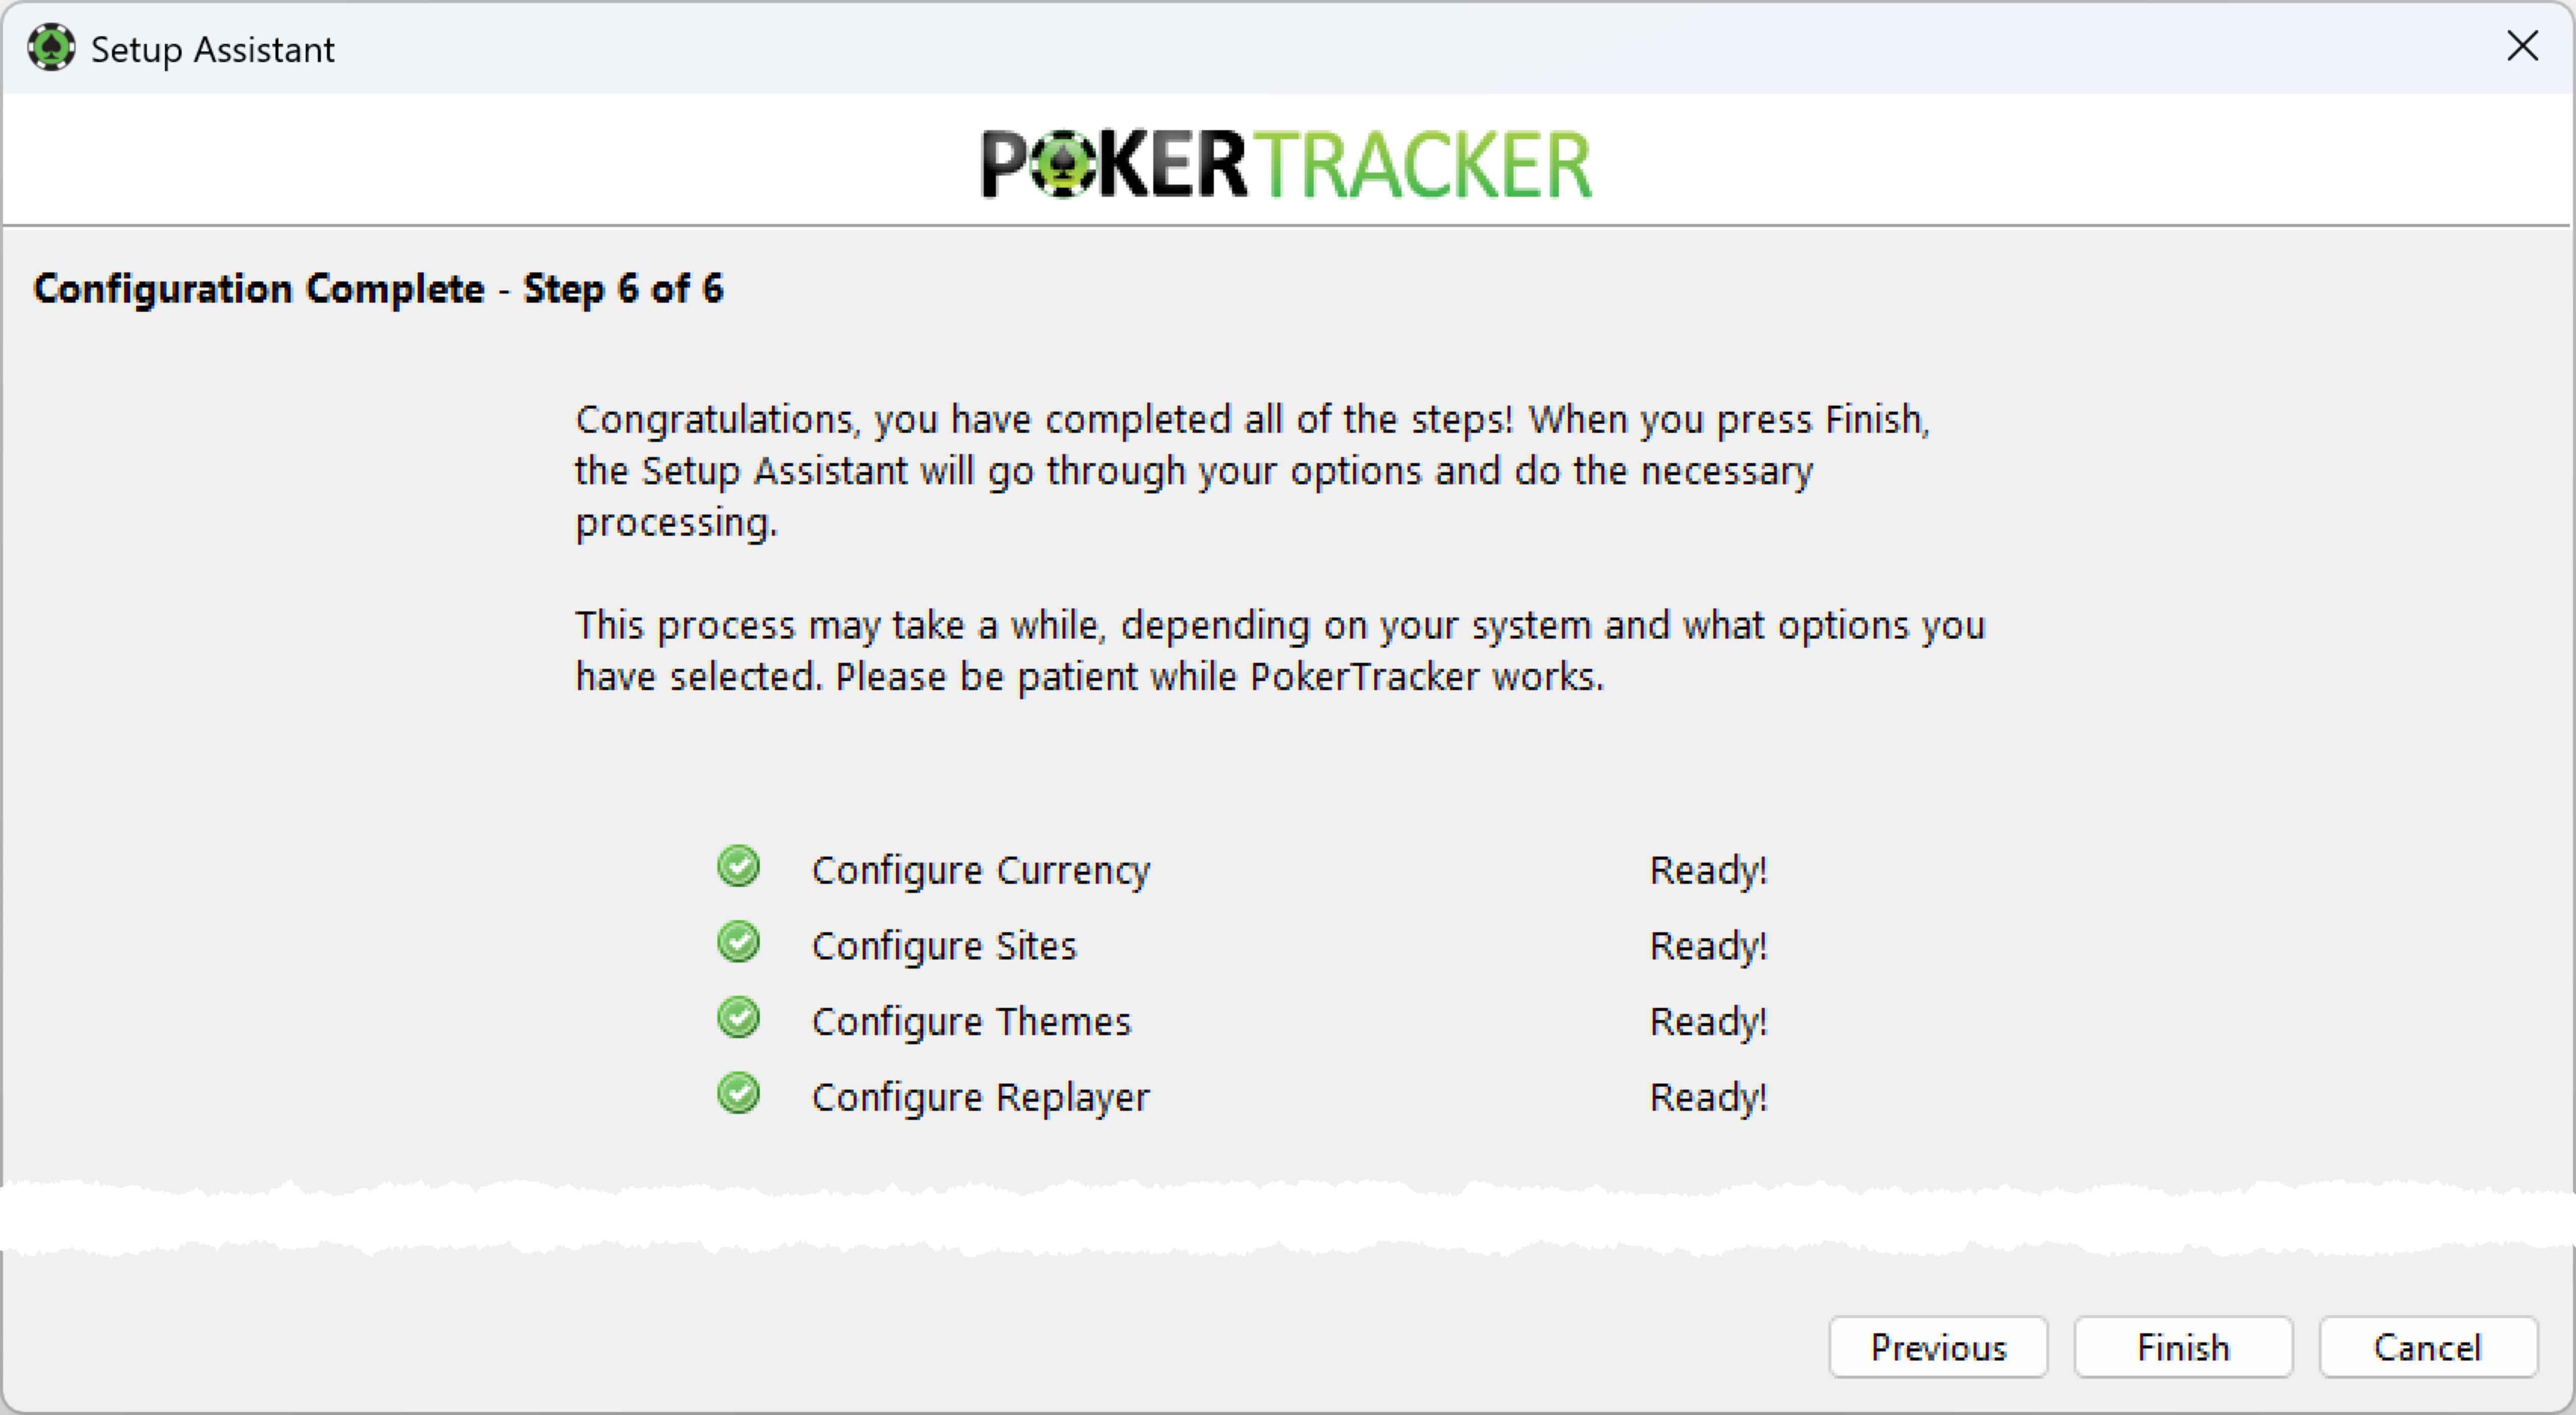
Finishing Your Configuration
Click Finish to apply your options and import any hand histories you selected. This may take some time depending on your system and selections, so let PokerTracker 4 finish for best results. To go back and make changes, click Previous.
Begin Using PokerTracker 4
With PostgreSQL and your poker sites configured, you're ready to start using the program. This section covers the basics: importing hand histories and reviewing your stats.
Importing Hand Histories
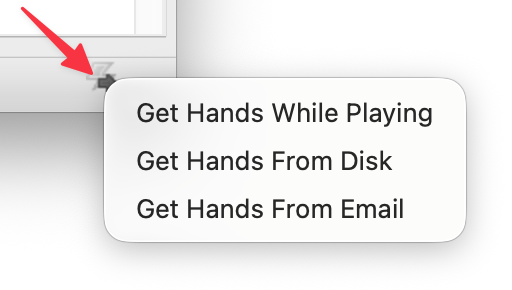
Each time you play, start PokerTracker 4 and open the Play Poker page. You have three import options:

- Get Hands While Playing: Import hand histories and start the HUD in real time as you play.
- Get Hands From Disk: Manually import hands from your hard disk — individual files or entire folders.
- Get Hands From Email: A special-use feature for select poker rooms (e.g. Party Poker tournament summaries sent via email).
You can also reach these options by clicking the icon in the bottom-right corner of PokerTracker 4.
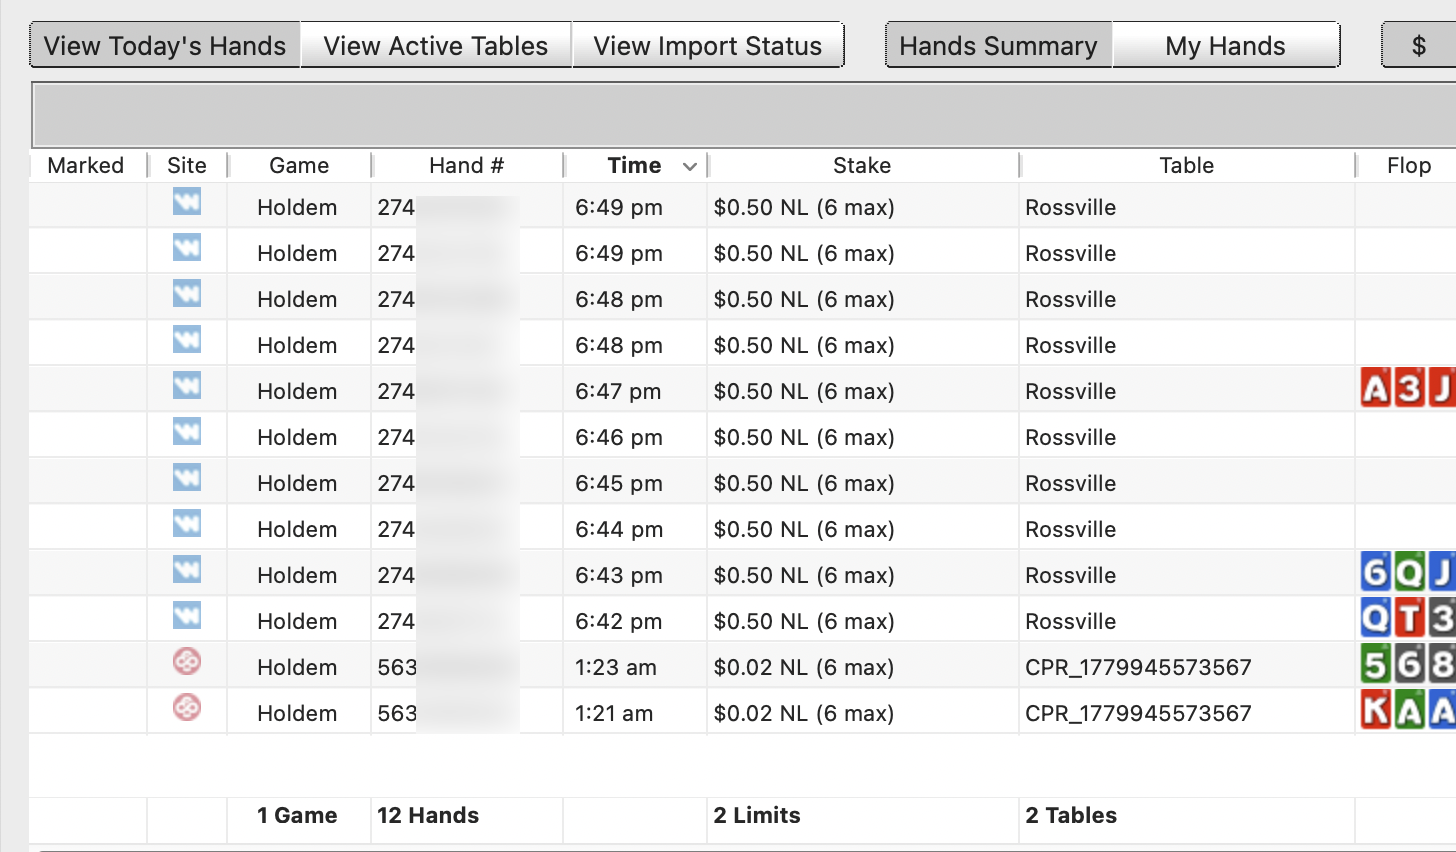
To import in real time, click Get Hands While Playing and PokerTracker 4 starts importing automatically. As hands import, information populates below in one of three views:

- View Today's Hands: Every hand you've imported today.
- View Active Tables: Each table you are currently playing on.
- View Import Status: Details about the current import, including any errors.
You can filter the list further — show marked hands only, tagged hands, a set number of hands, or cash games versus tournaments. Below is an example of a real-time import using Get Hands While Playing with the View Today's Hands view:
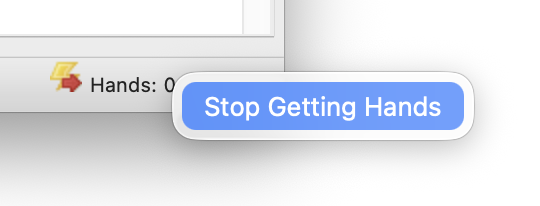
When you're done playing, click Stop Getting Hands. You can also stop from the bottom-right corner of PokerTracker 4 by clicking Stop Getting Hands.
Starting the HUD
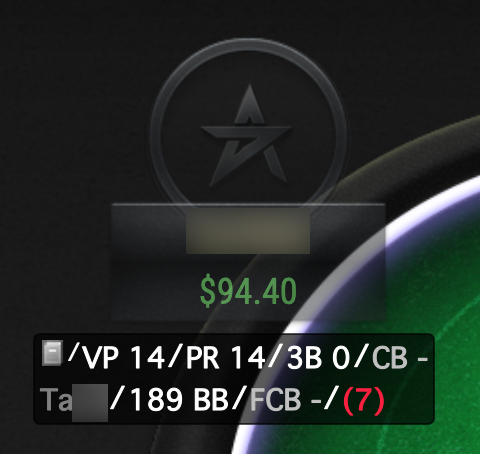
The heads-up display (HUD) starts automatically when you click Get Hands While Playing — the only import option for real-time play. Other import methods will not start the HUD. Once started, the HUD appears on your table after a hand or two. Here is the default HUD displayed correctly:
Two buttons appear at the top of each table when the HUD is active. Click the tag button on the left to pull up hand histories and mark them for review.

Click the PokerTracker 4 chip on the right to open a range of options. From here you can unlock the HUD to move a player's stats, change how stats are displayed, switch the HUD profile, and more.
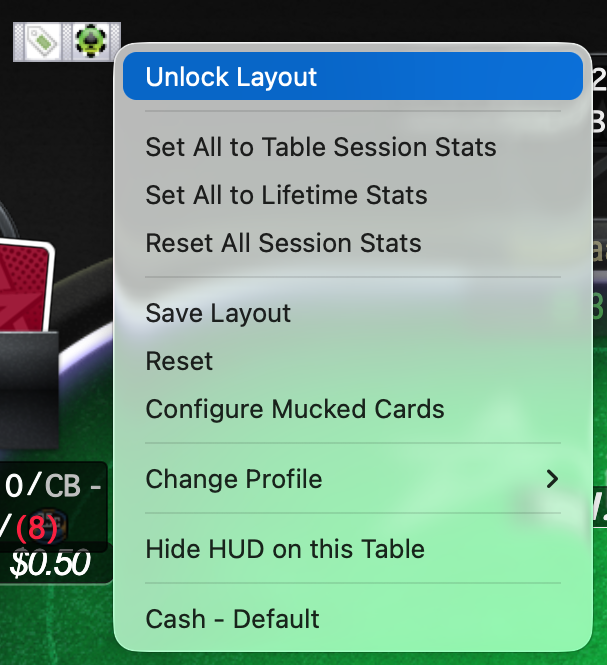
The HUD stops displaying when you stop importing hands. To personalize it, read our tutorial on HUD configuration.
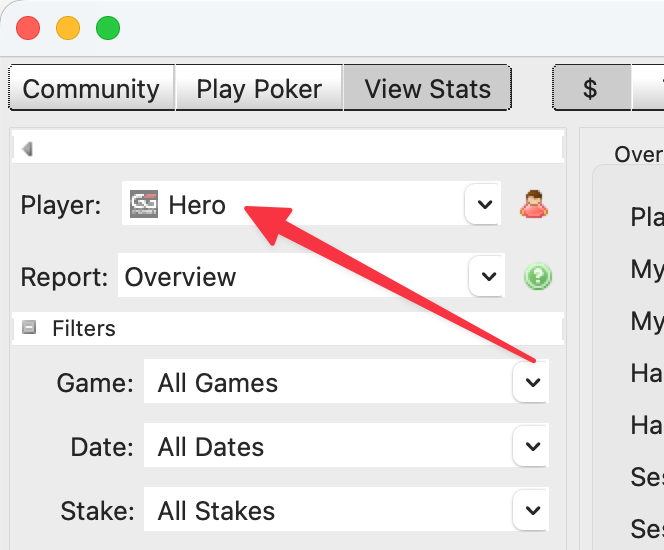
Changing the Active Player
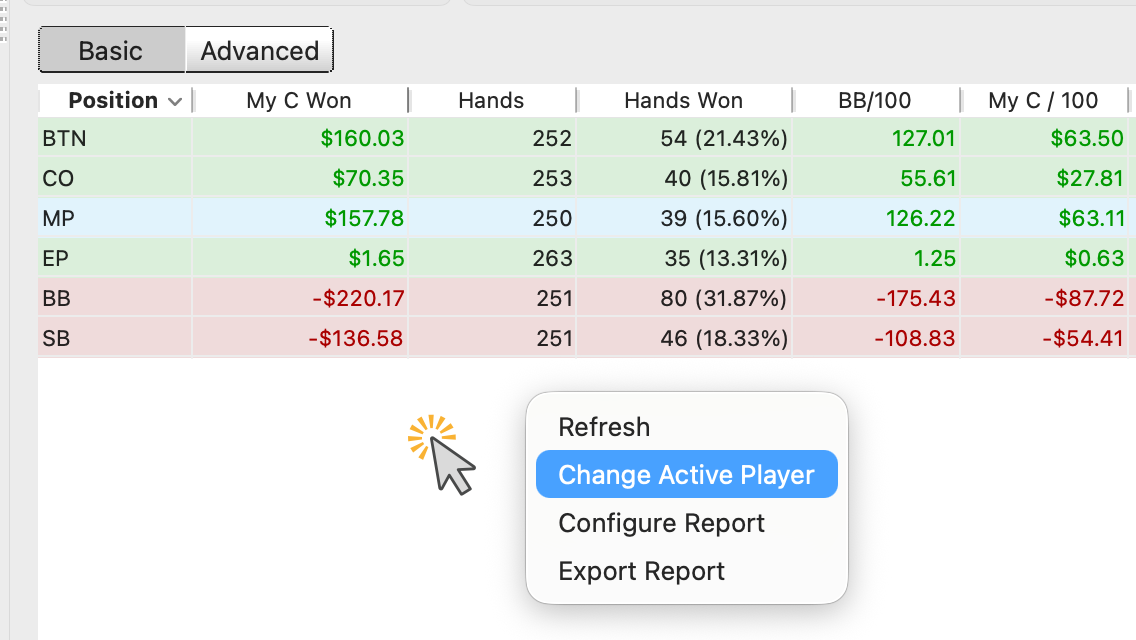
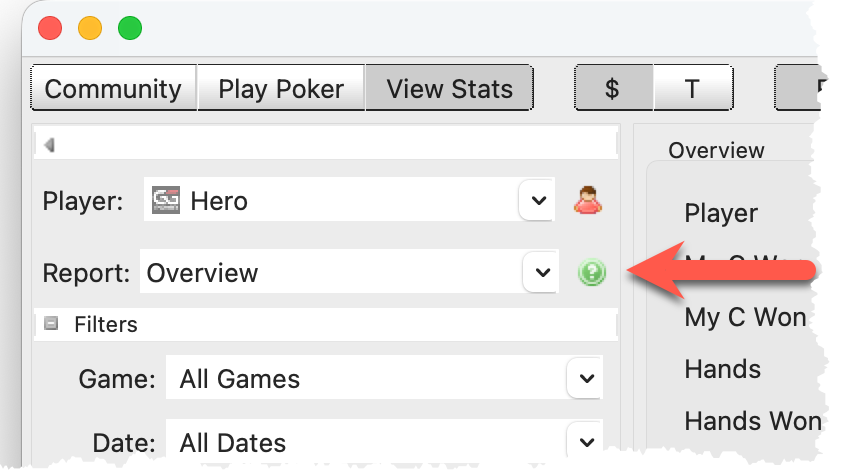
The active player is the player used in reports, graphs, and stats. Keeping it consistent across every tab makes review simple. To change the active player, right-click any area where information is populated and choose Change Active Player. For example:
You can also change the active player from any View Stats tab: click the Player drop-down on the left and choose a player. To search for a username, click Choose New Player from the drop-down. The active player stays the same across all View Stats tabs.
If you play on multiple sites, create an alias to merge all of your usernames, stats, and results under a single name. See the configuring a PokerTracker 4 alias tutorial.
Reviewing Statistics and Hands
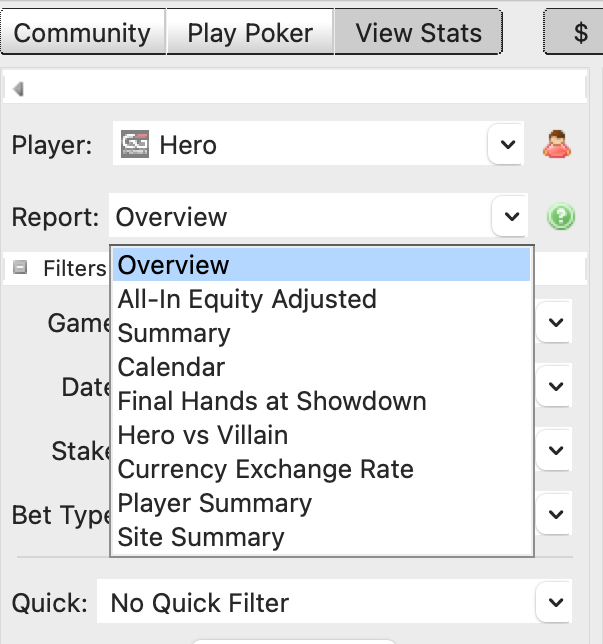
Once hands are imported, you can view your stats and your opponents'. Click View Stats and choose cash games ($) or tournaments (T). You'll see five tabs: Results, Statistics, LeakTracker, My Reports, and Graphs.

Each tab offers ways to explore results, hands, and leaks. Use the filters and drop-down menus on the left of each tab to drill down and customize your analysis.
You can also customize the report on each tab: right-click any area where information is populated and click Configure Report to add, delete, or modify the stats shown.
After any change — configuring a report, modifying a filter, or changing the active player — refresh the report by clicking Refresh in the upper-right corner.
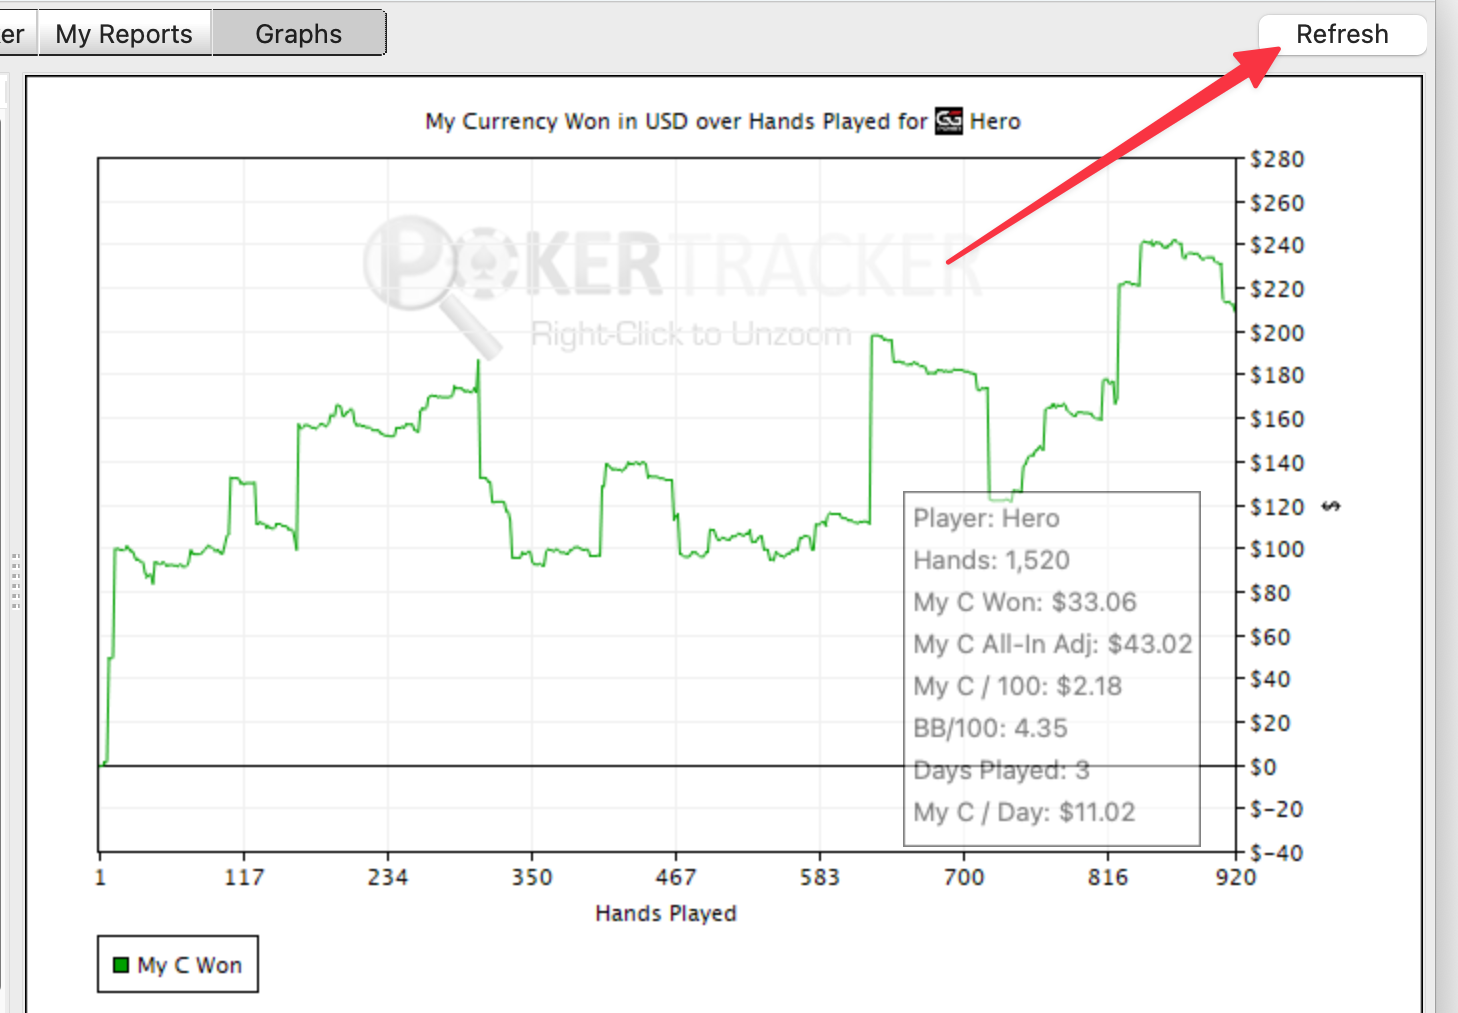
PokerTracker 4 offers countless ways to graph data, find leaks, track results, and analyze hands. Explore each tab and report, and customize as you go with filters and report settings. To learn what a report does, click the TV icon to watch a short explanatory video.
Learn the Meaning of Each Stat in PokerTracker 4
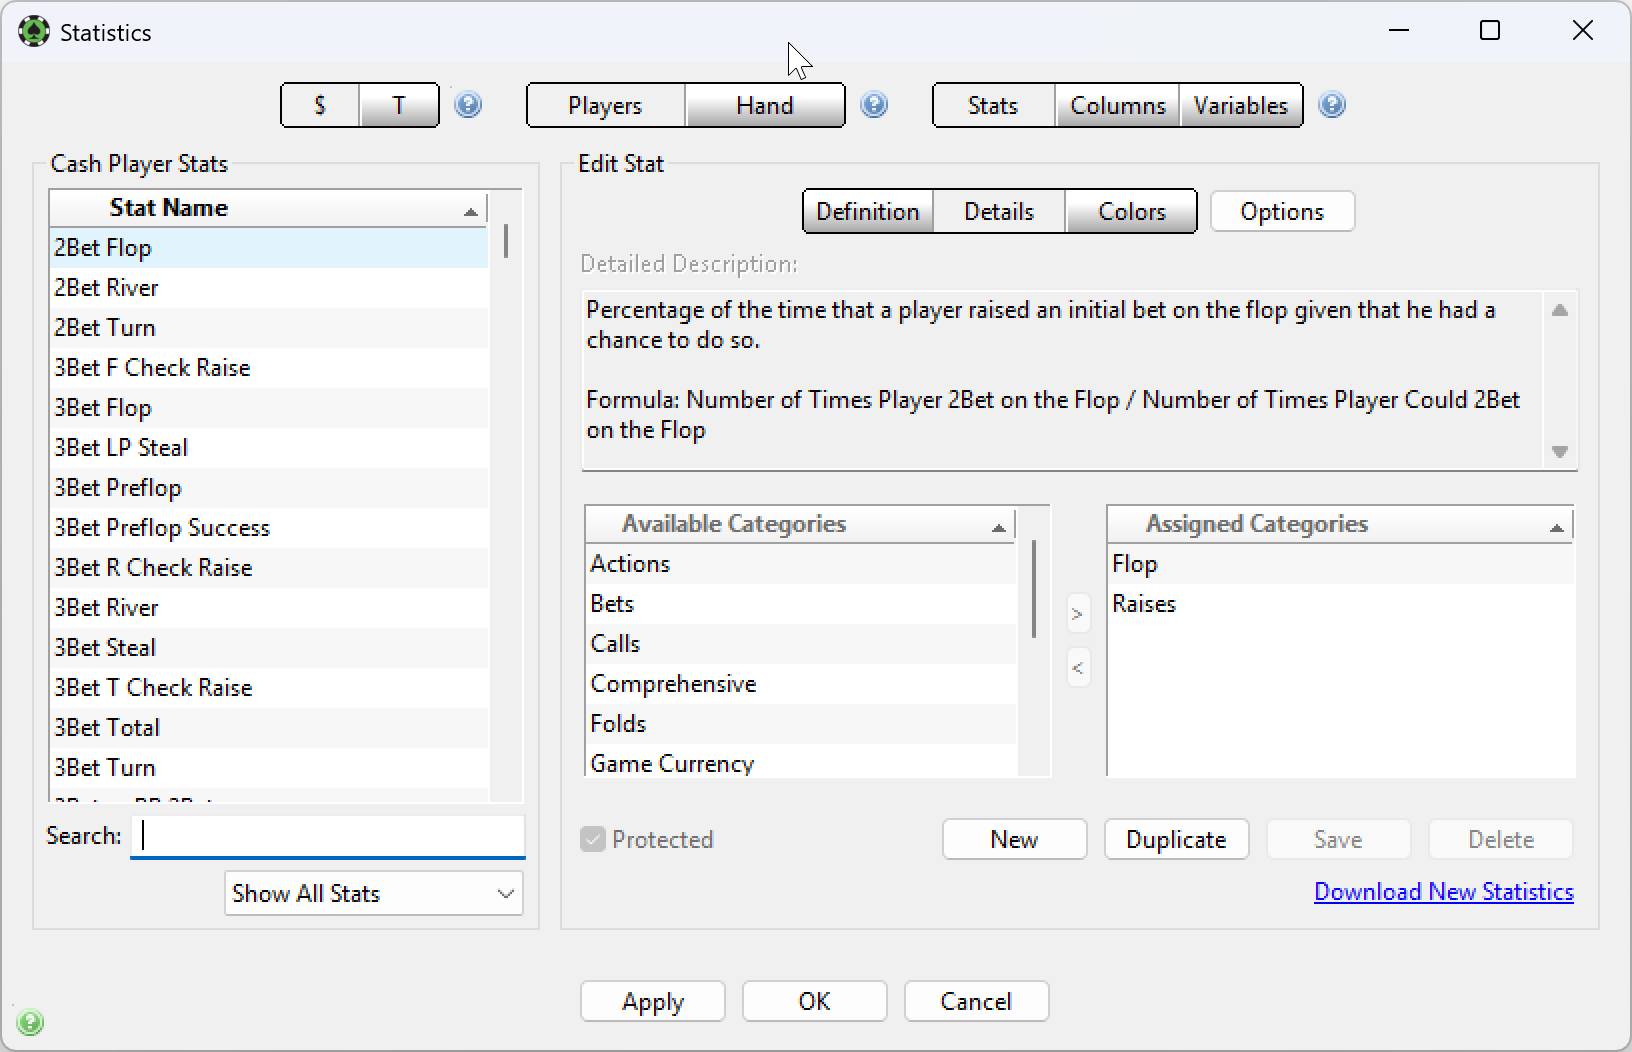
The definition for every PokerTracker 4 stat is available within the program. Open the Statistics Window by clicking Configure > Statistics, then:
- Choose Cash Games or Tournaments.
- Choose a stat category:
- Player Stats record the actions a player takes. Nearly all stats used in the HUD and result reports are Player Stats.
- Hand Stats record data about a specific hand, used mostly in Hand Reports.
- In the search field, type any keyword that helps you find the stat you're looking for.
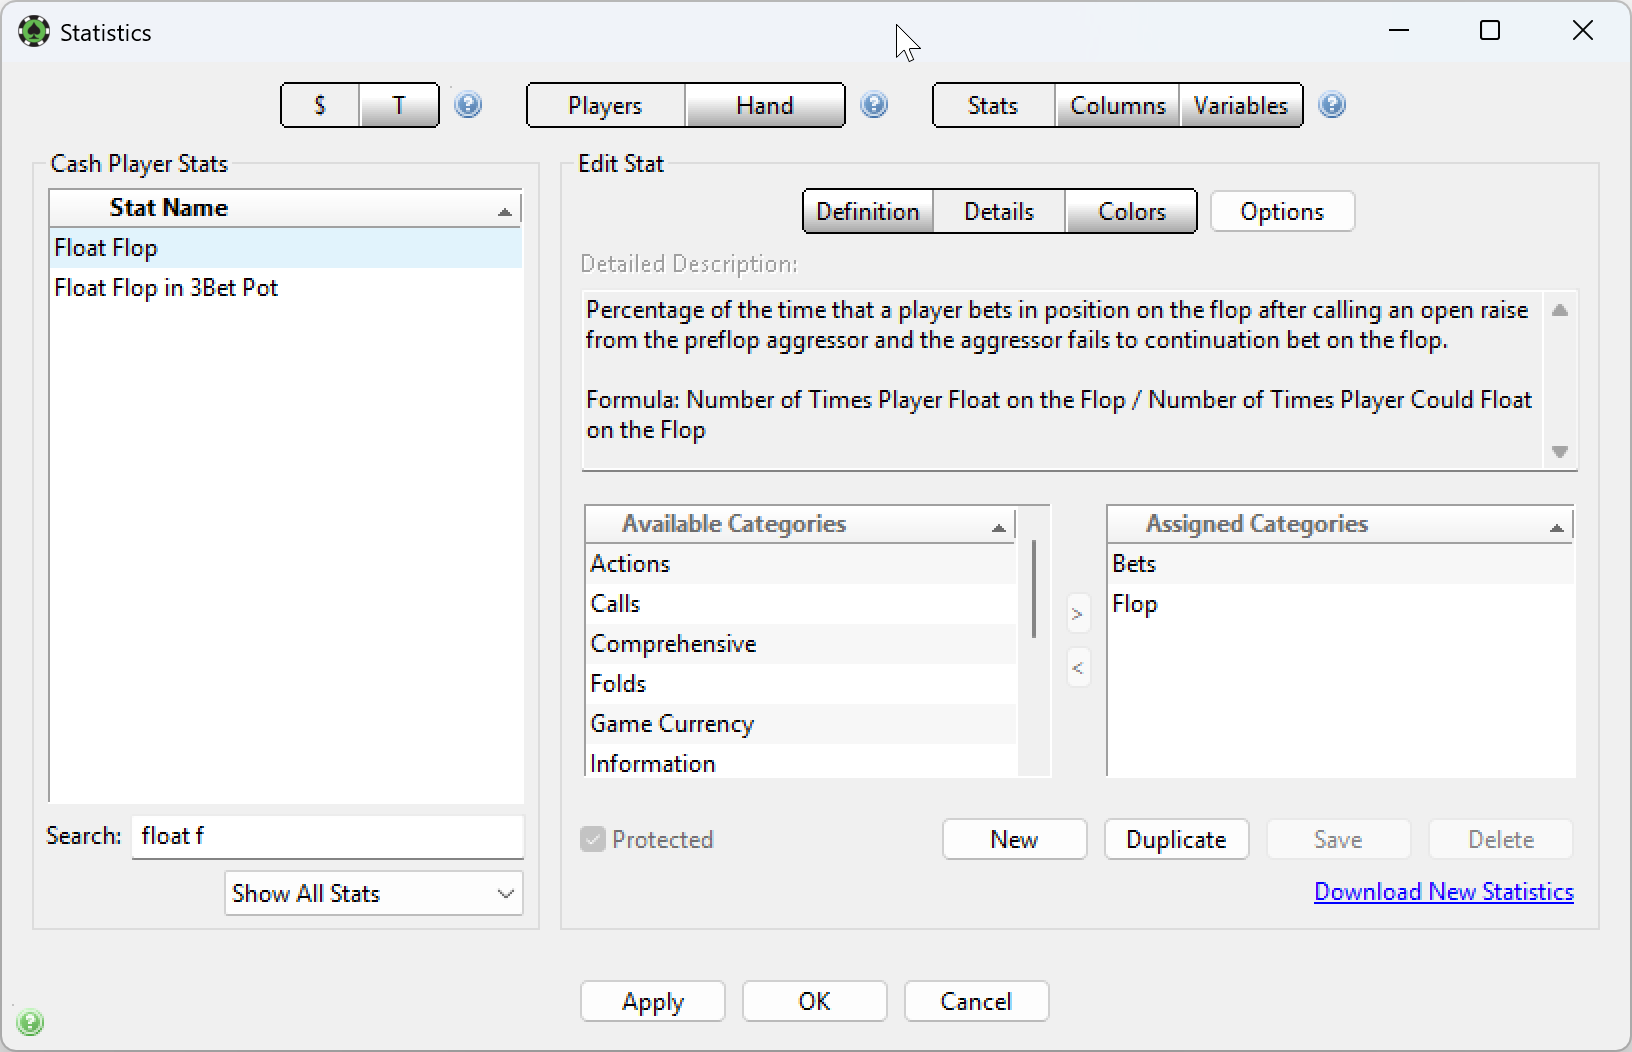
For example, to learn what Float means, type "Float" into the search box to list every stat containing that word. Narrow the list by adding "F" to show only stats where floating occurred on the flop. Select Float Flop from the Stat Name column on the left; its definition and formula appear in the Details page under Detailed Description.
PokerTracker 4 Tutorial Videos
PokerTracker 4 includes over 3.5 hours of tutorial videos. Each runs 3 to 5 minutes and covers a specific topic.
To watch a tutorial video:
- Open the report or window you want to learn about in PokerTracker 4.
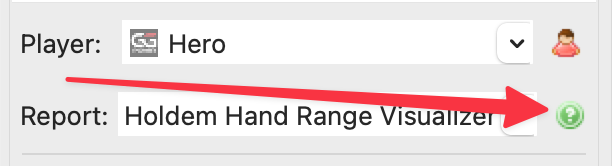
- Click the green video button
 to open the tutorial video for that topic.
You can also watch every built-in tutorial video in one place via the PT4 Videos link in the footer of any page on our website.